
Hey everyone! Welcome back to our ongoing series on how to use different popular 35mm cameras. Today we have the Yashica FX-3! This compact, mechanical SLR seems simple, but there are a lot of features that you may not know. We’ll go over the basic features of the camera, what each button/dial does, how to load film into the camera, and what you’ll see through the viewfinder. We’ll also talk a bit about the benefits of the FX-3 and things to look out for to make sure yours is working properly!
Without further ado, let’s get started! Click below to watch the video or keep scrolling for the text version of this Yashica FX-3 guide!
Table of Contents
- History
- Preparing the Camera for Use
- Features & Identification
- The Bottom of the Camera
- Camera Operation
- The Viewfinder
- Common Issues & Conclusion
History
The Yashica FX-3 was released in 1979 as part of the ongoing collaboration between Yashica and Carl Zeiss/Contax. This agreement was founded a few years prior with the intention of sharing manufacturing secrets between the two companies. Carl Zeiss would lend lens designs and optical technology and Yashica would contribute mass-production expertise as well as electronics design.
The two companies decided to create their own lens mount, the Contax/Yashica (or C/Y) mount. Many cameras were produced for this mount under both the Yashica and Contax brands with similar technology and access to all the lenses made by both companies. That means the FX-3 can use Carl Zeiss lenses, which is a big advantage!
The Yashica FX-3 is regarded as a great camera. It’s simple, easy to use, and has great lenses. It’s definitely worth using if you find one. Let’s get into it!
Preparing the Camera for Use
Before you get shooting, there are a few things you should check on your camera. We have to make sure we have our lens mounted properly and a battery installed at the very least. Let’s figure out how to do that together!
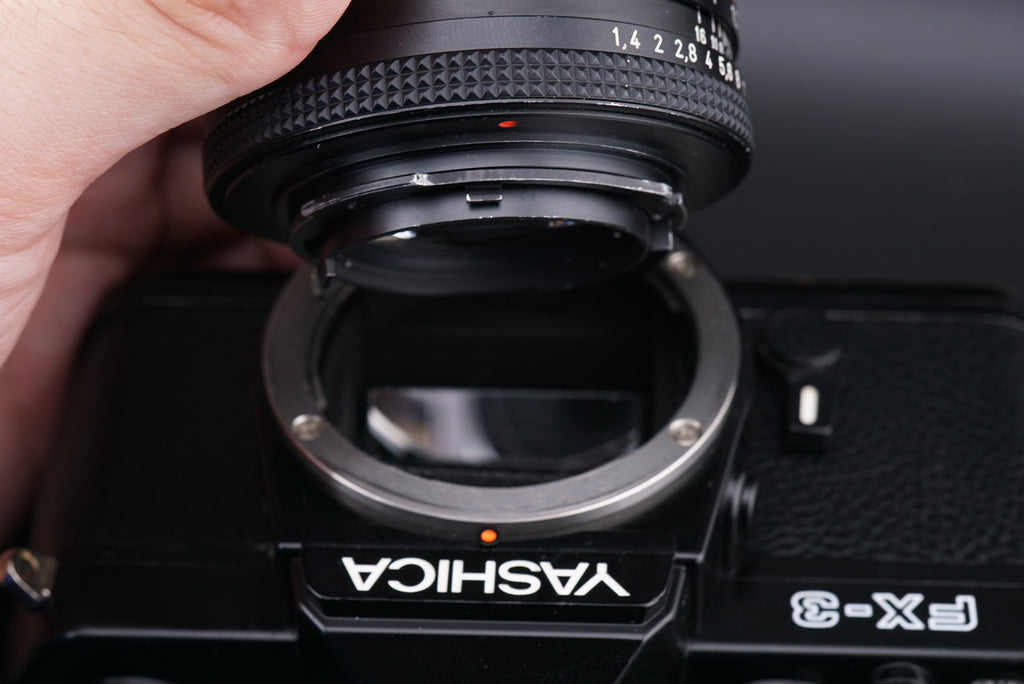
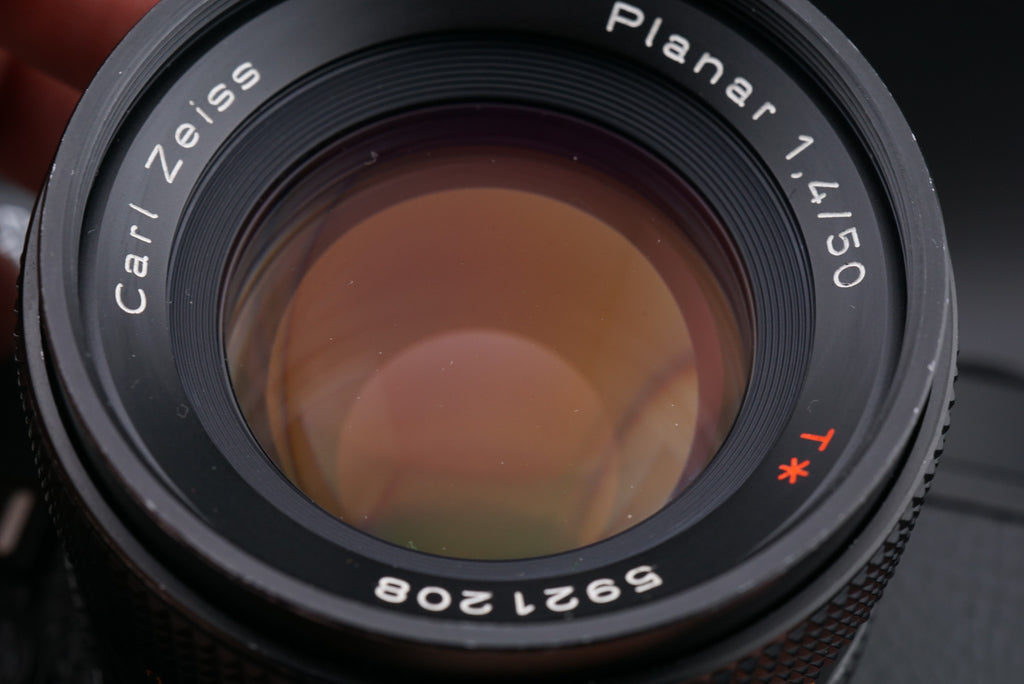
Installing a Lens
The Yashica FX-3 can use various lenses, from fisheyes to portrait lenses to ultra telephotos. Both Carl Zeiss and Yashica produced full lens lineups for the FX-3, differing only slightly in build and optical quality. Before buying a lens, make sure it’s for Contax/Yashica mount.
To attach a lens, we line up the red dot on the lens’ metal bayonet with the red dot just below the Yashica logo on the camera. Then we insert the lens into the camera and turn the lens clockwise. The lens should click into place when the lens is facing upwards.
 |
 |
To take off a lens, there’s one extra step. There’s a small circular button on the side of the lens mount between the Yashica logo and the FX-3 branding. Hold this button down and you should be able to twist the lens counterclockwise. After a small turn, the lens should come right off!

Hopefully, that makes sense. It’s a relatively simple operation, but maybe the video above will show it better. Next, let’s install a battery!
Installing a Battery
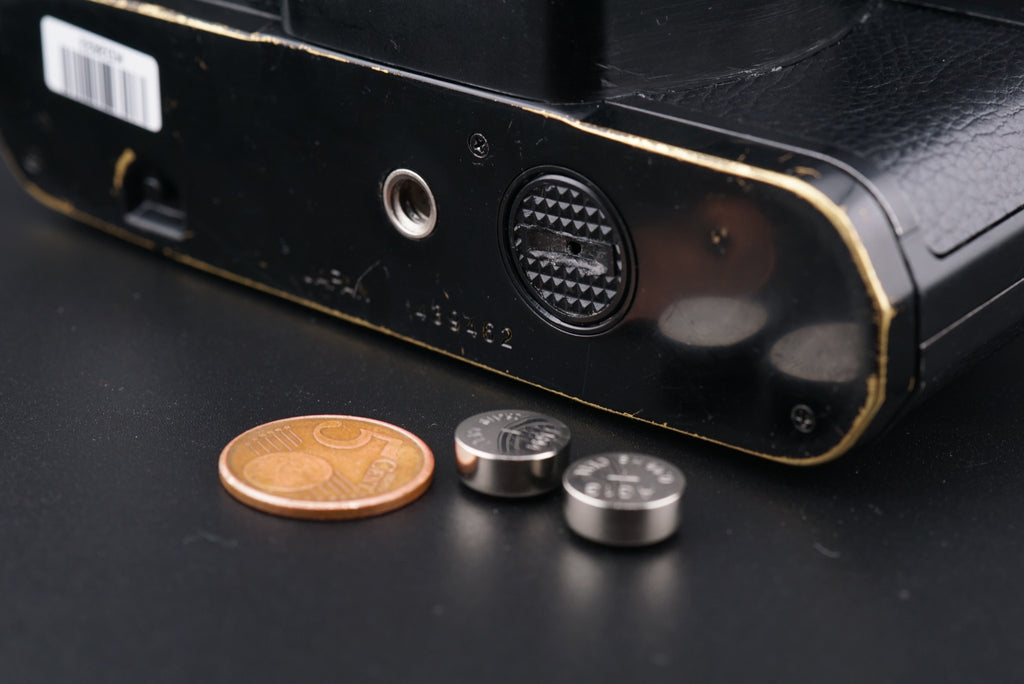
The Yashica FX-3 does not need batteries to function. Batteries are only needed for the light meter. So if you want light metering, you’ll need two LR44 batteries. They’re very common button-style batteries and should be available at camera or hardware stores.
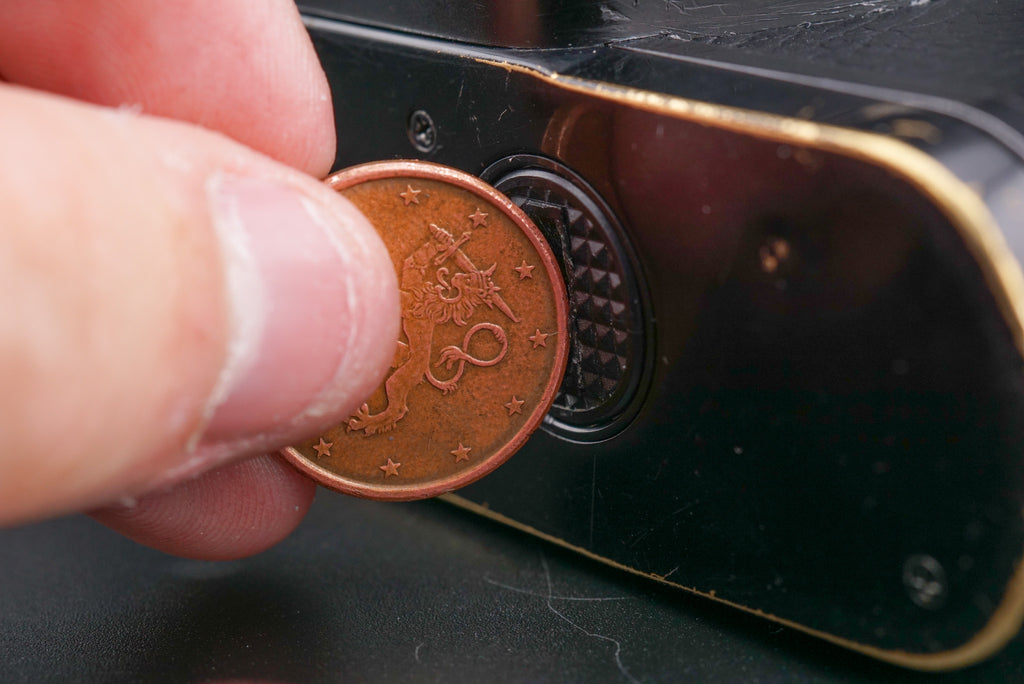
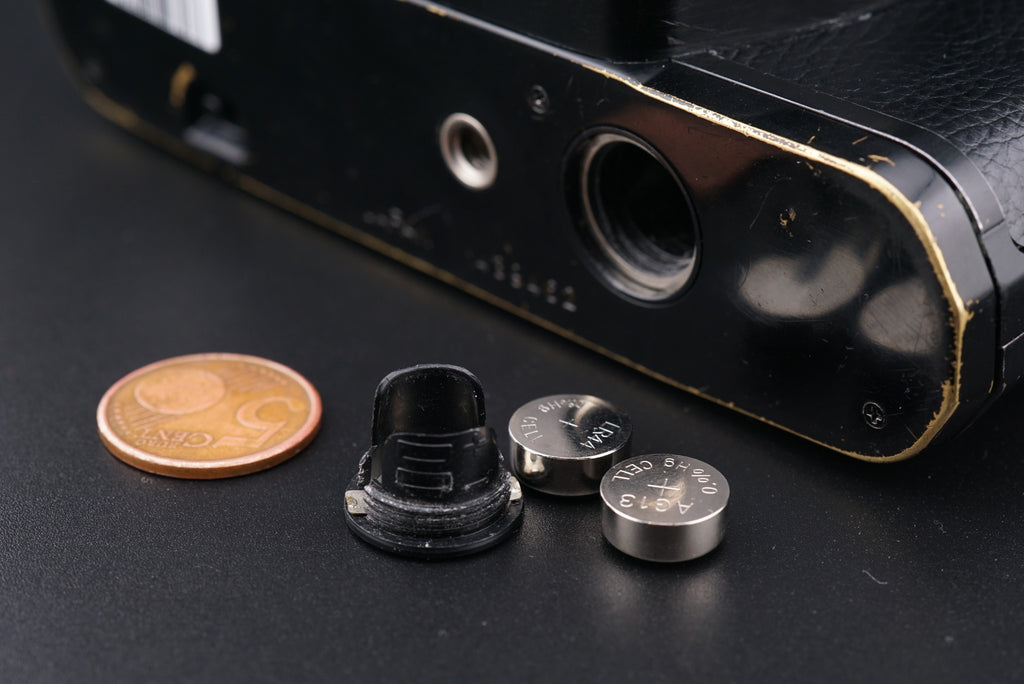
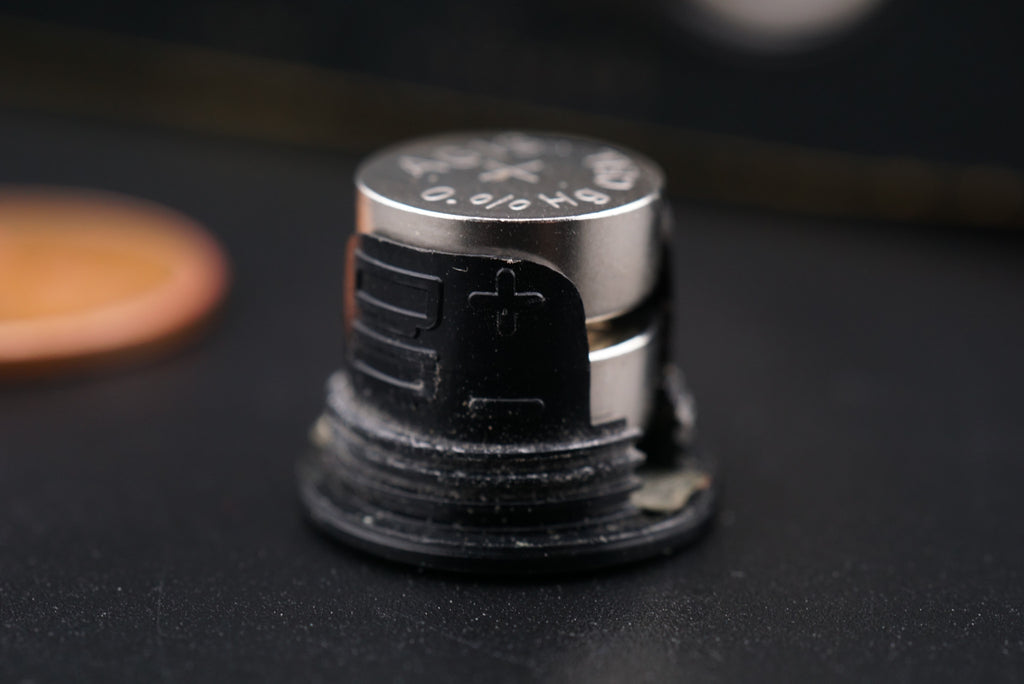
The batteries go in the bottom of the camera. There’s a circular cover with a coin slot on it. Use a coin to turn this counterclockwise and it’ll eventually come off. Look for the diagram on the cover to see how to insert the batteries. Be sure to put them in the right direction or they won’t work!
 |
 |
 |
 |
Features & Identification
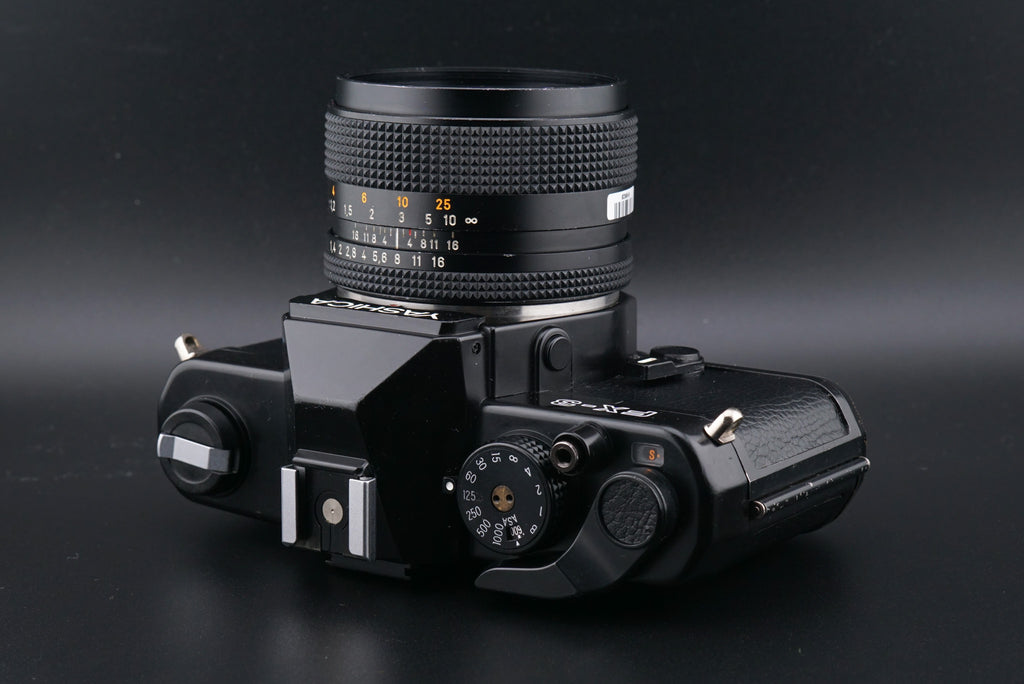
Now that we have the battery and lens installed, let’s take a look at the features of the Yashica FX-3! There are a lot of dials, switches, and other things on the camera that may be intimidating, but fear not! We’ll break down everything you’ll need to know to use the camera. Let’s get started with the top of the camera!
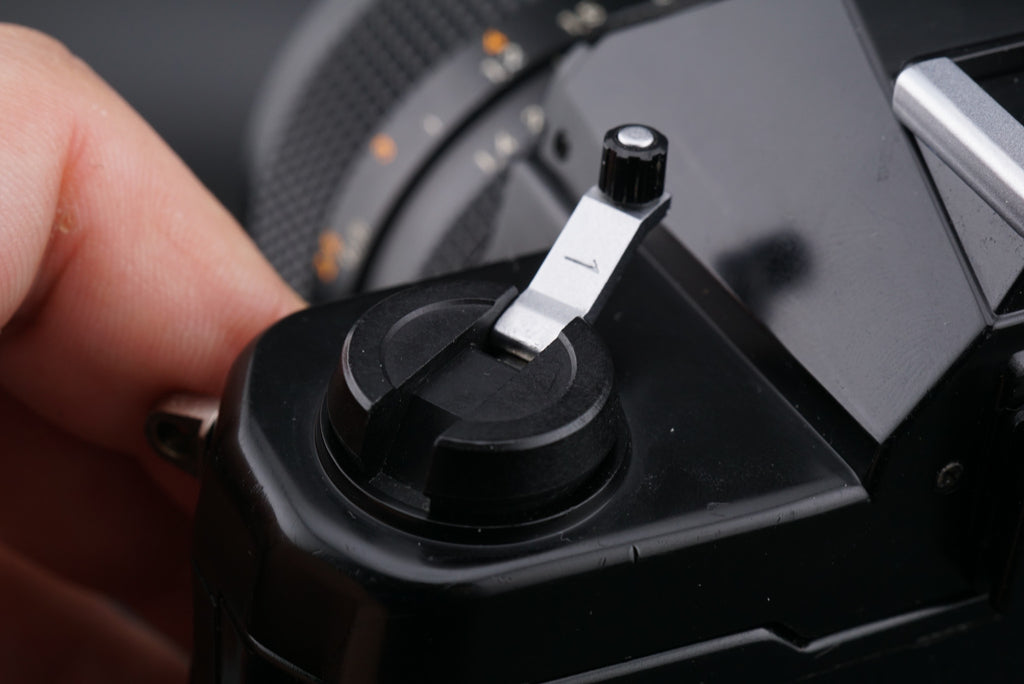
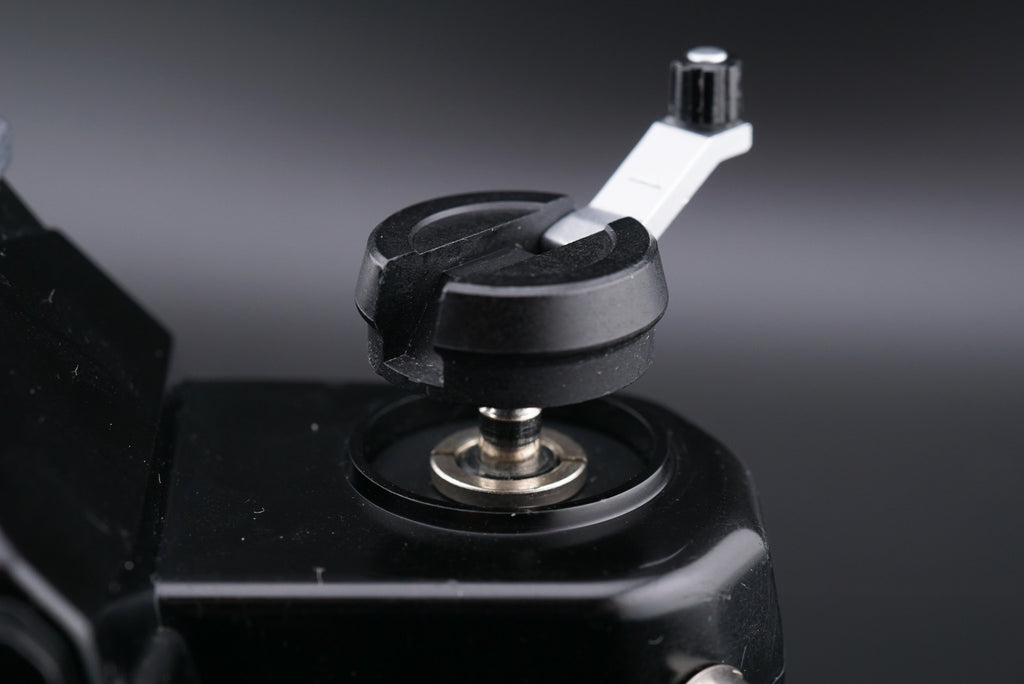
Rewind Knob
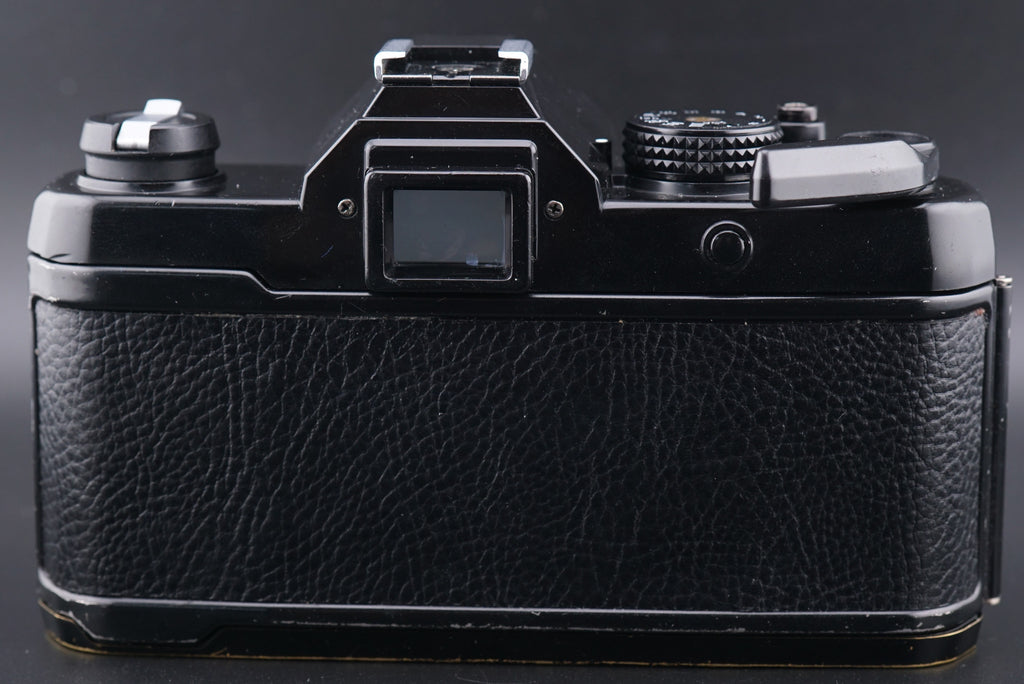
Going from left to right on the top of the camera, the first thing you’ll see is the rewind knob. This knob is how we rewind film and open the back. It’ll be very important when we learn how to load/unload film later.
It should have a small fold-out lever in the middle of it that can make it easier to turn. You can also pull the knob straight up to open the film back. Don’t do this while there’s film inside!
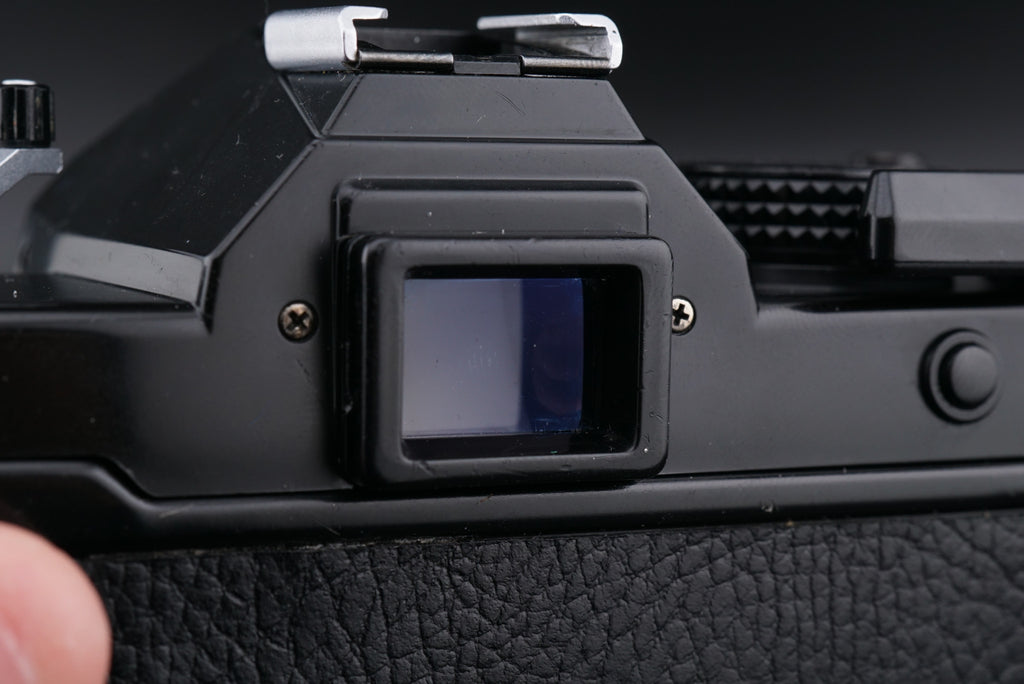
Viewfinder & Hot Shoe
A bit further to the right, you’ll find the viewfinder and the hot shoe. The viewfinder is where you look in order to focus and compose your photos. We’ll cover exactly what you’ll see a bit later.
Next to that is the hot shoe. This is where you’d attach accessories like a flash or external light meter. The Yashica FX-3 can be used with most flashes in manual mode only. As long as the flash has a single electric contact pin in the middle, it can communicate with the camera. The FX-3’s flash sync speed is 1/125s.
 |
 |
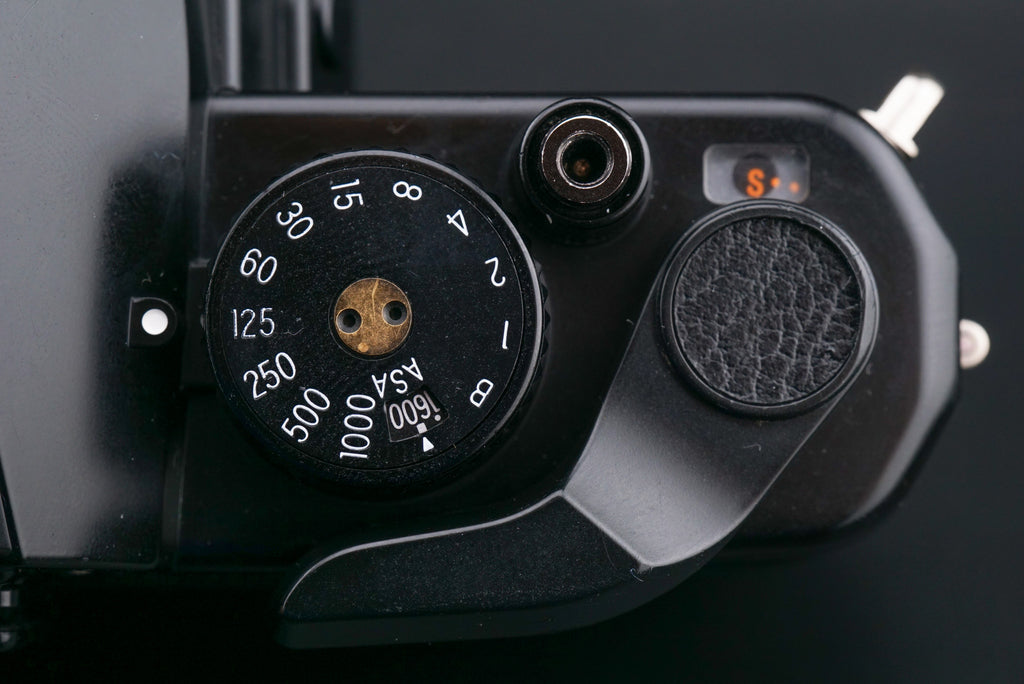
Shutter Speed Dial & ISO Control
The section to the right of the viewfinder and flash shoe houses some of the most important functions of the Yashica FX-3. Let’s start with the shutter speed dial.
This dial contains all our shutter speeds. These correspond to fractions of a second and tell us how long the shutter will be open. If you set it to 1, that means the film will be exposed to light for 1 second. If you set it to 1000, it means the shutter will be open for 1 one thousandth of a second.
Aside from the numbers, there’s also “B”, which stands for bulb. In this mode, the shutter will stay open for as long as you hold the shutter button down. This can be useful for long-exposure photography.
Different shutter speeds affect your photo in a number of ways. Fast shutter speeds (1/250s and above) are able to capture motion without blurring the subject. The downside is that the subject has to be quite well-lit for you to use these speeds. In low light, you’ll have to use slower shutter speeds.
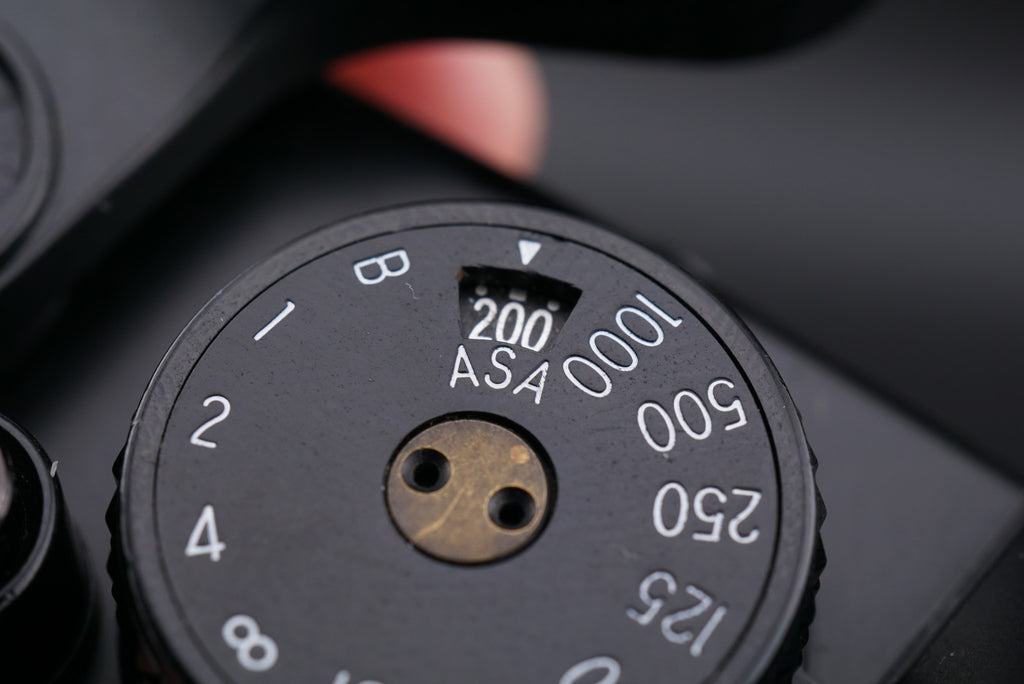
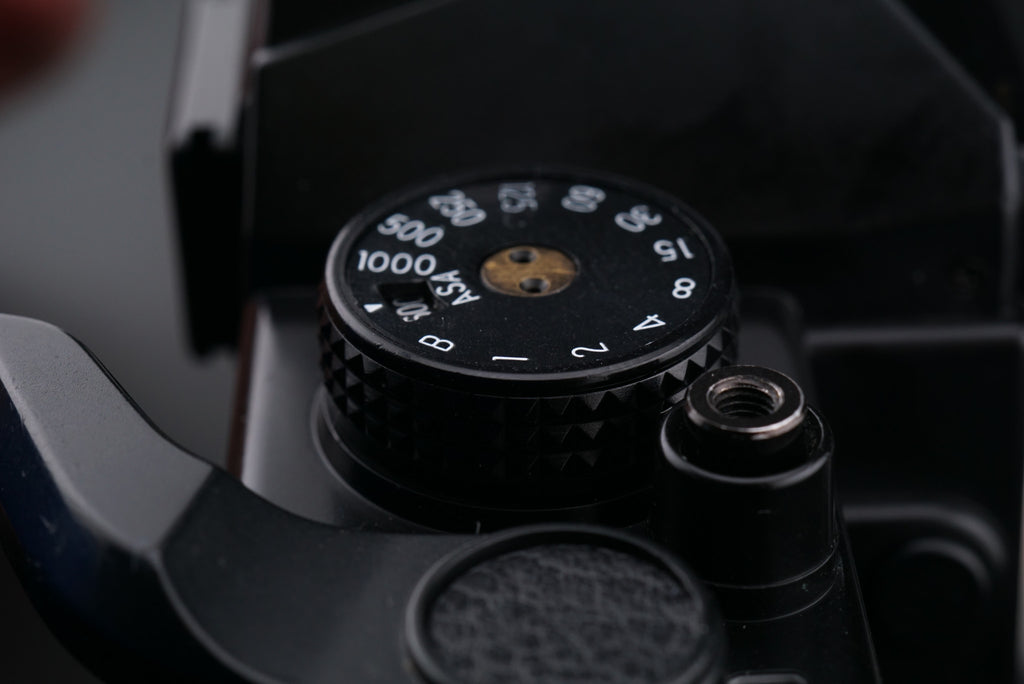
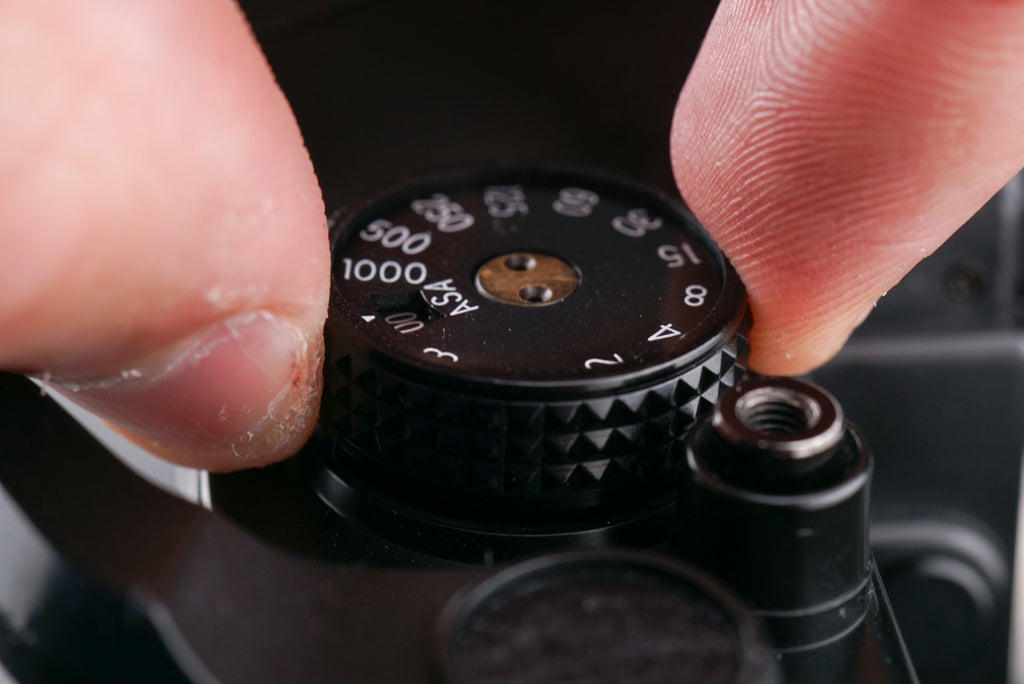
The other thing of note here is our ISO control. Notice the window between “B” and 1000. It says “ASA” below it, but this is just an older name for ISO. This describes the sensitivity of the film being used. Most film canisters will have a large number on them. To change your ISO, lift the outer ring of the shutter speed dial and rotate. The number in the window should change without changing the shutter speeds.
 |
 |
The Yashica FX-3 can handle films from ISO 12 to ISO 1600 without you having to do anything aside from setting the ISO properly.
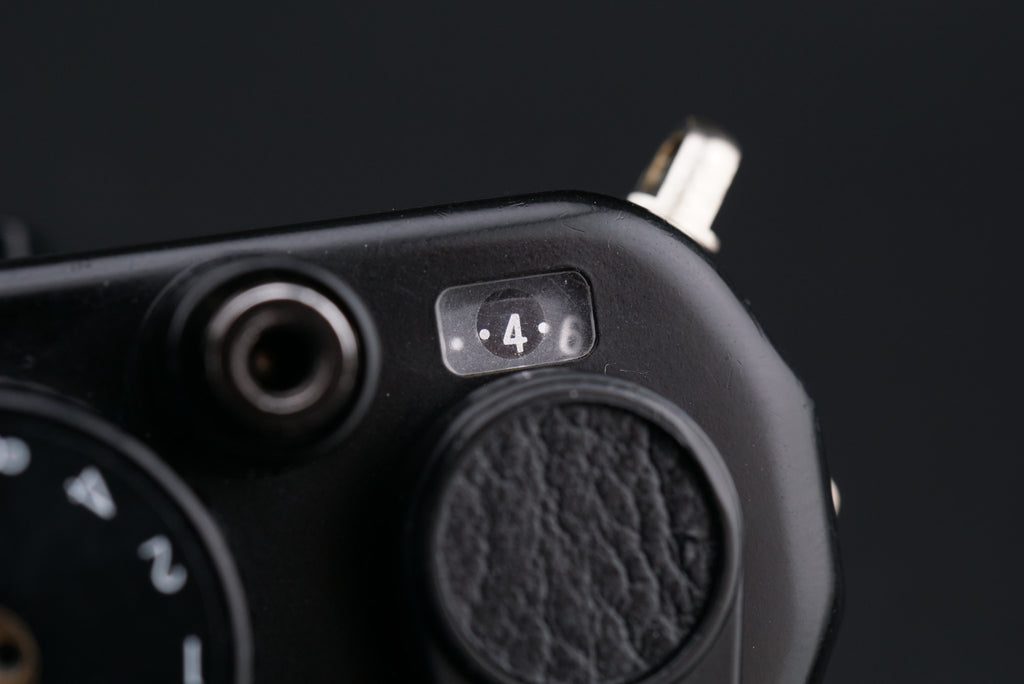
Film Advance Lever, Shutter Button, & Frame Counter
Next to the shutter speed dial are a few more essential controls. We’ll start with the film advance lever. We need to pull this lever after every shot. It turns out to the right about 180º and should snap back when it’s released.
This lever moves the film inside the body and gets the shutter ready to fire. The camera won’t let you take a photo if it hasn’t been pulled properly, so if your shutter button isn’t doing anything it’s a good idea to check the advance lever.
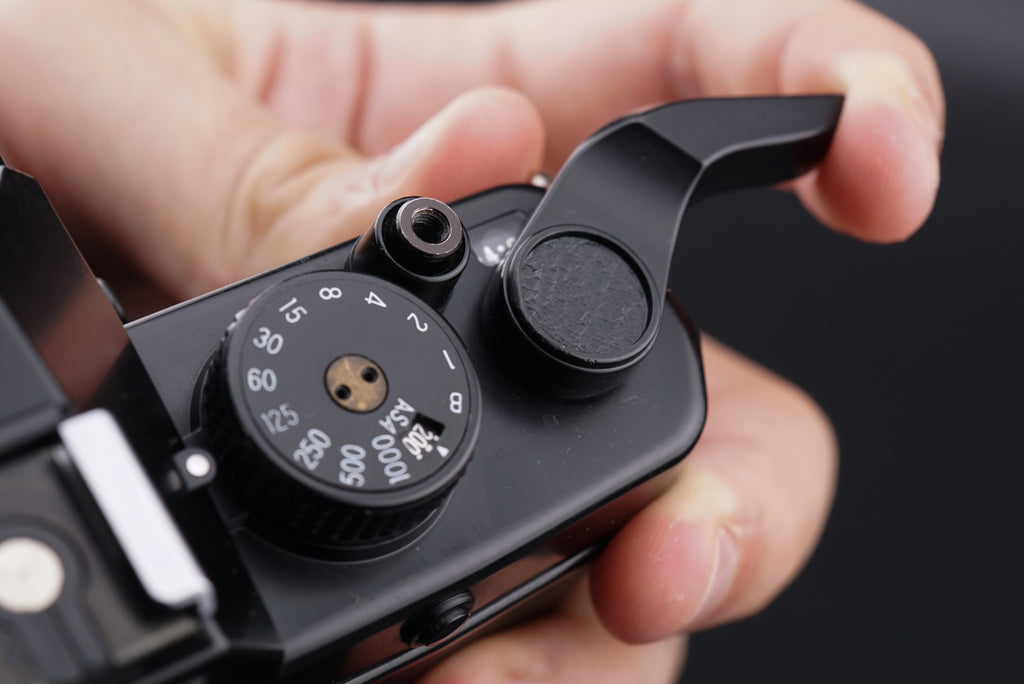
Speaking of the shutter button, that’s above and to the left of the advance lever. It’s a small circular button with a threaded socket in the middle. When you pull the film advance lever and then press this down, the shutter will fire. The threaded socket is for an off-camera shutter release cable.
Next to the shutter button and advance lever is our frame counter. This counts up as you advance the film and resets whenever the film back is opened. It should count up to around 40 even if the roll inside can only be ~36 exposures. If you’re careful with your loading, you can squeeze a few extra photos out of each roll. We’ll get to loading later!
Now let’s look at the lens!
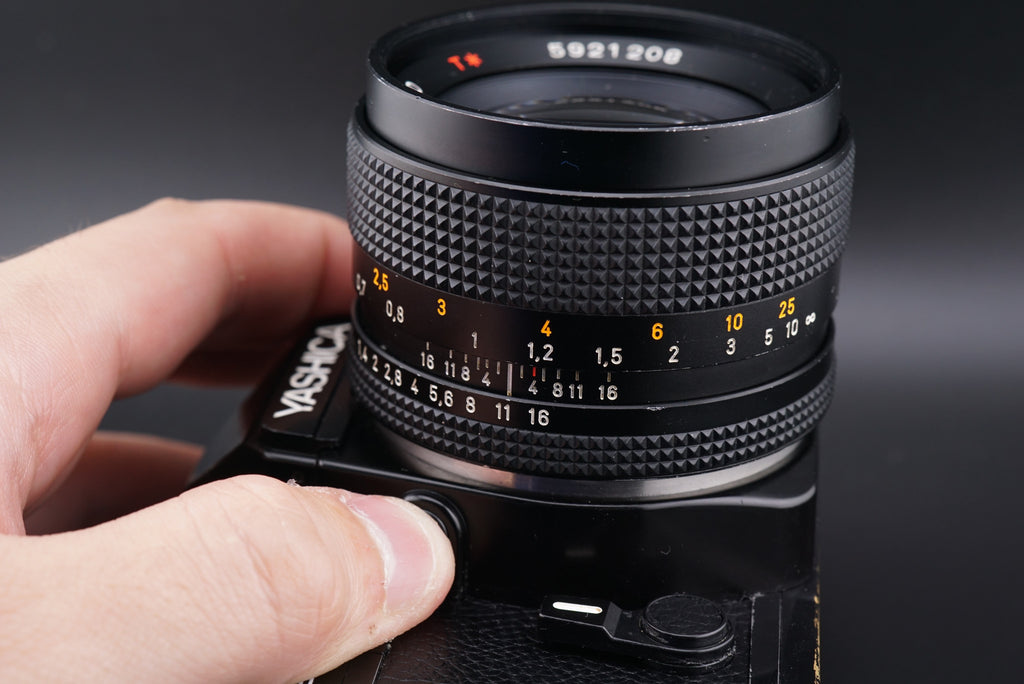
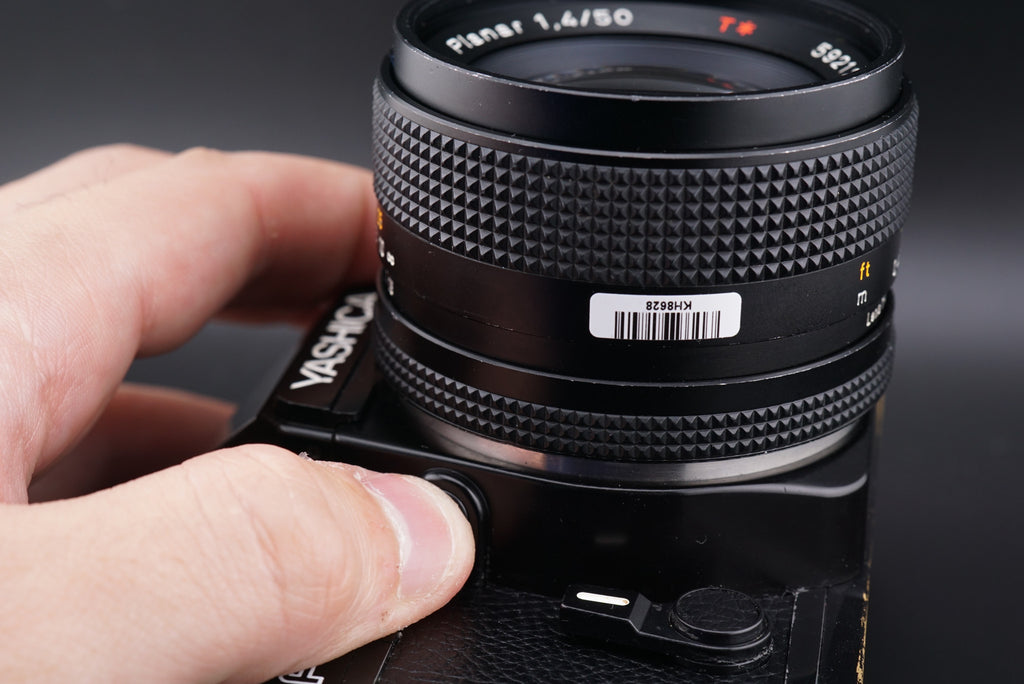
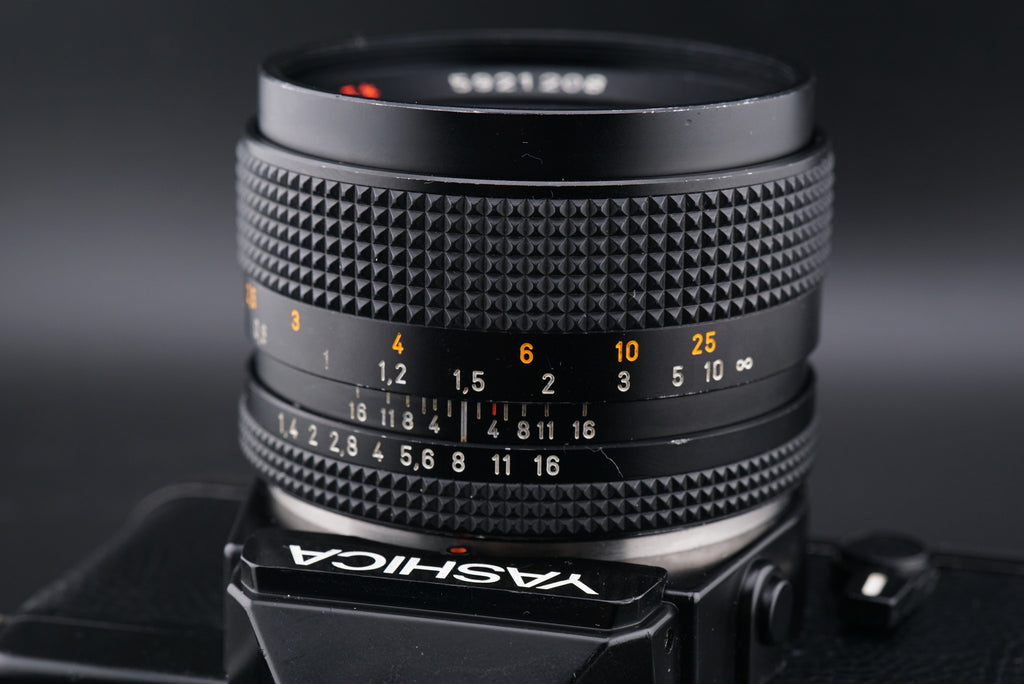
Aperture Ring
The closest thing to the camera body is the aperture ring. This can be turned and clicks into place at various numbers. On our 50mm f1.4 lens here, we have options from 1.4 to 16. So what IS an aperture?
The aperture is an opening inside the lens that closes right at the moment when you fire the shutter. This controls how much light is let through at once, which mainly affects depth-of-field.
A larger aperture number correlates to a more narrow opening. This lets less light in, but gets more things in focus. Apertures like f8, f11, or f16 will give you a wide area of focus, which is great for landscape photography and environmental portraiture.
Smaller aperture numbers let more light in and contribute to a more shallow depth of field. If you’re looking for a sharp subject and a blurry background, try wider apertures like f1.8 or f2.8. Lower aperture numbers will also make it possible to take usable photos in low-light environments.
Focus Ring & Hyperfocal Scale
Above the aperture controls are the focus controls. Both the focus ring and the hyperfocal scale are used in combination to make your subject sharp and in focus. The Yashica FX-3 is a manual focus camera.
The focus ring tells us what distance is in focus. As you turn it, the number that lines up with the white line below is the distance your subject should be. If you set it to infinity, anything far away will be in focus. This 50mm lens can focus on anything from infinity to 0.45m, making it great for general photography and capable of decent close-ups as well.
Surrounding that white line are some other markings. These make up our hyperfocal scale, and can help us do some zone focusing. Just as the white line indicates precise focus, these marks indicate a range of distances at which a subject will be in focus when using a given aperture. Sounds confusing, I know. Maybe an example will help.
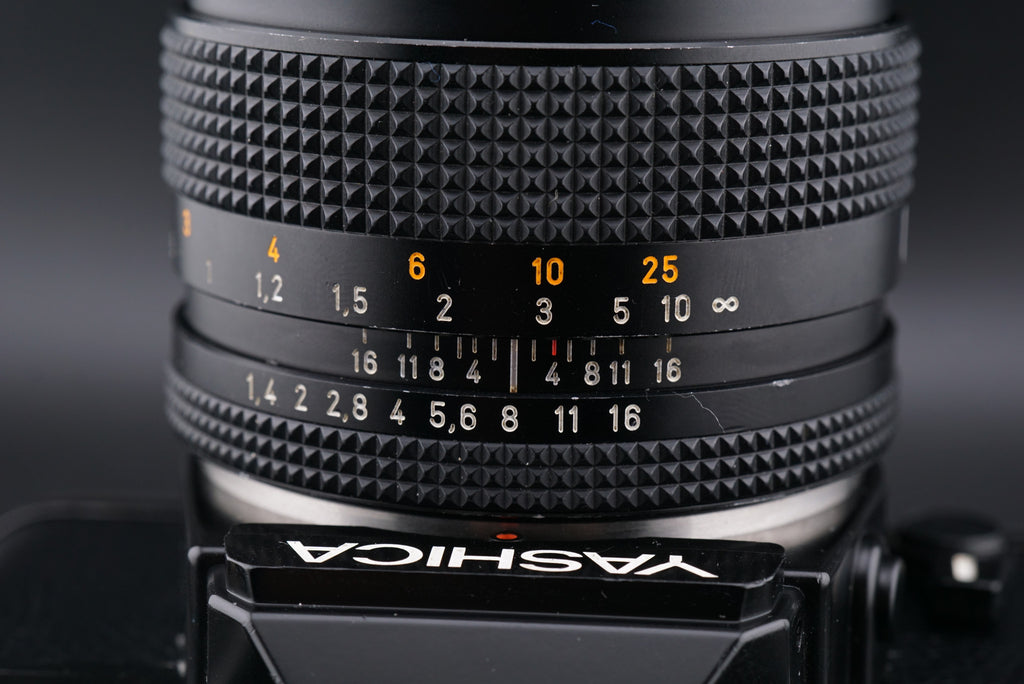
If you set the lens to f16, then you can use the widest lines on the hyperfocal scale to determine your focus range. If you put 10m on the mark on the right, you can see that the mark on the left is around 1.5 meters. That means that everything between 1.5 and 10 meters will be in focus! Hopefully, that makes sense. If not, feel free to ignore the hyperfocal scale entirely and focus inside the viewfinder only. We’ll cover that shortly!
Self-Timer & Light Meter
Another thing of note is the self-timer. This is the lever on the front left of the camera. You can pull it away from the lens to activate the self-timer mode. When you press the shutter button, a countdown will begin. The lever will slowly move back to its original position and then the camera will take a picture. Great for group shots!

Then, of course, there’s the light meter. The Yashica FX-3 has a built-in light meter that can read the scene and tell you what settings to use. To activate the meter, you have to press a button on the back right of the camera. It’s a small, circular button directly below the shutter speed dial. The light meter will only activate when this button is depressed.
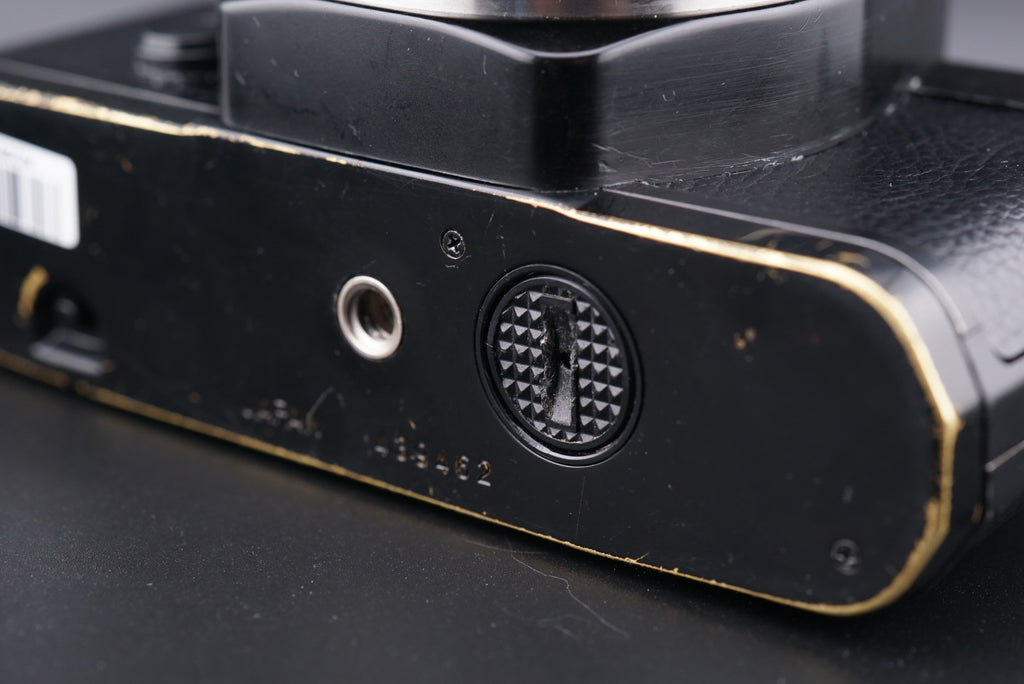
The Bottom of the Camera
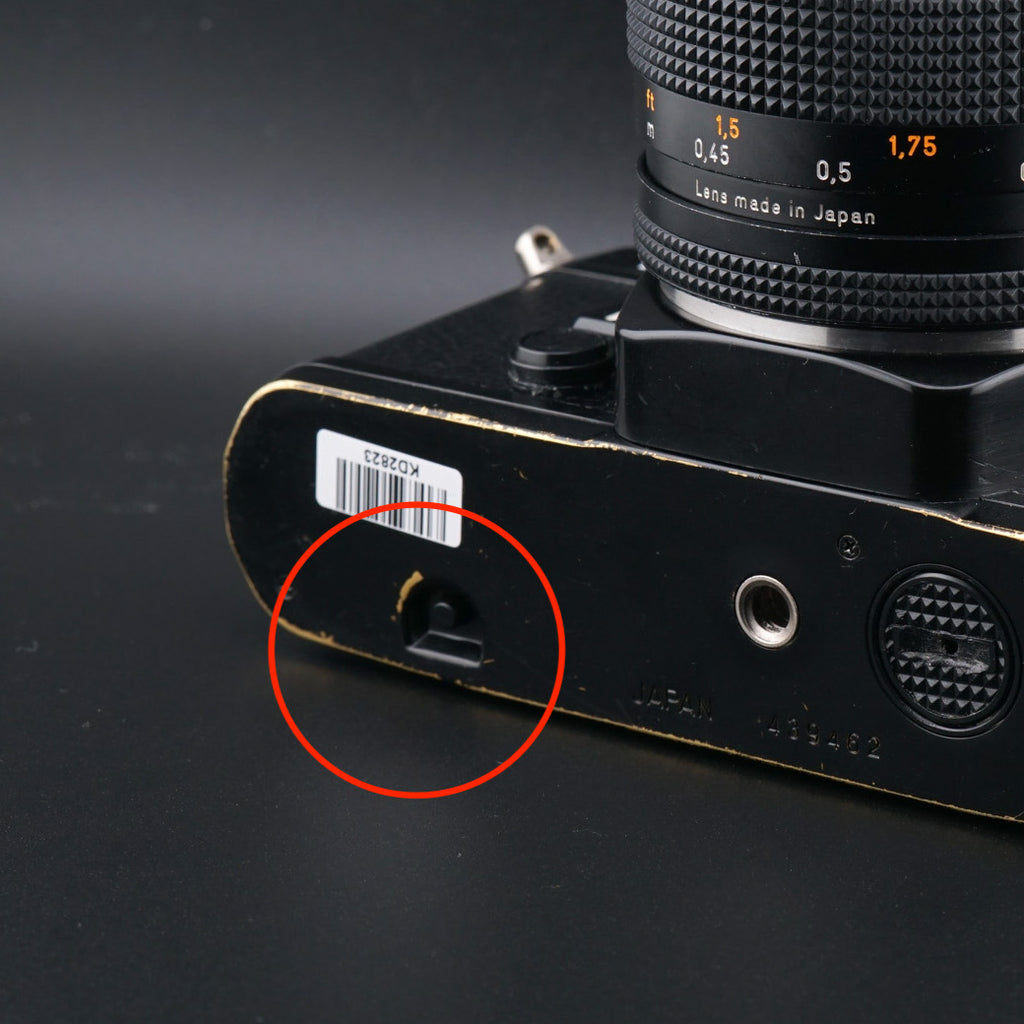
There isn’t that much to cover on the bottom of the camera, just some accessory features. As with most other cameras, there’s a tripod socket in the center. This allows you to attach the camera to a tripod for more stable shooting. The Yashica FX-3 has a ¼” tripod screw.
Next to that is the battery compartment we used earlier. Be careful when inserting and removing this compartment. It’s made of plastic that’s now 40+ years old, so it can bend and break quite easily. Finding a replacement for this piece isn’t easy, so be careful!
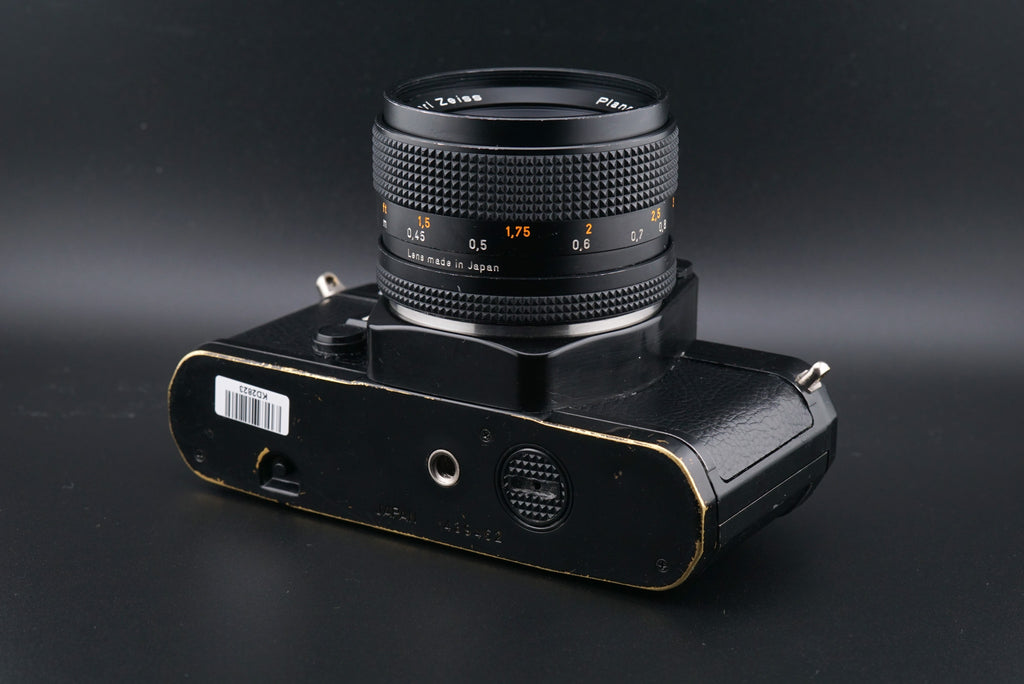
Aside from those, there’s also the rewind button on the bottom. The small black button in a recessed hole is the rewind button. We press this when we’re done with a roll and want to rewind it. It releases tension in the body and allows us to pull the film back into the canister for processing.
That just about covers the buttons, dials, and switches of the Yashica FX-3! Now let’s get into how to use it.
Camera Operation
In this section we’ll discuss how to load and unload film, what you’ll see through the viewfinder, and how to know your photos will be properly focused/exposed. From there, all that’s left is to pick something nice and take a photo of it!
How to Load Film
Loading film in the Yashica FX-3 is very similar to other 35mm SLRs. If you’ve loaded one before, it’ll be easy to figure out. If you haven’t, no worries! That’s what this guide is for.
Start with the camera upside down, resting on the lens. Take the rewind knob we mentioned earlier and pull it up. It should extend a bit and then stop. Pull it a bit harder and the film back should pop open! It’s spring-loaded, so it should have quite a bit of force behind it. If it doesn’t, there may be something wrong with the camera!
 |
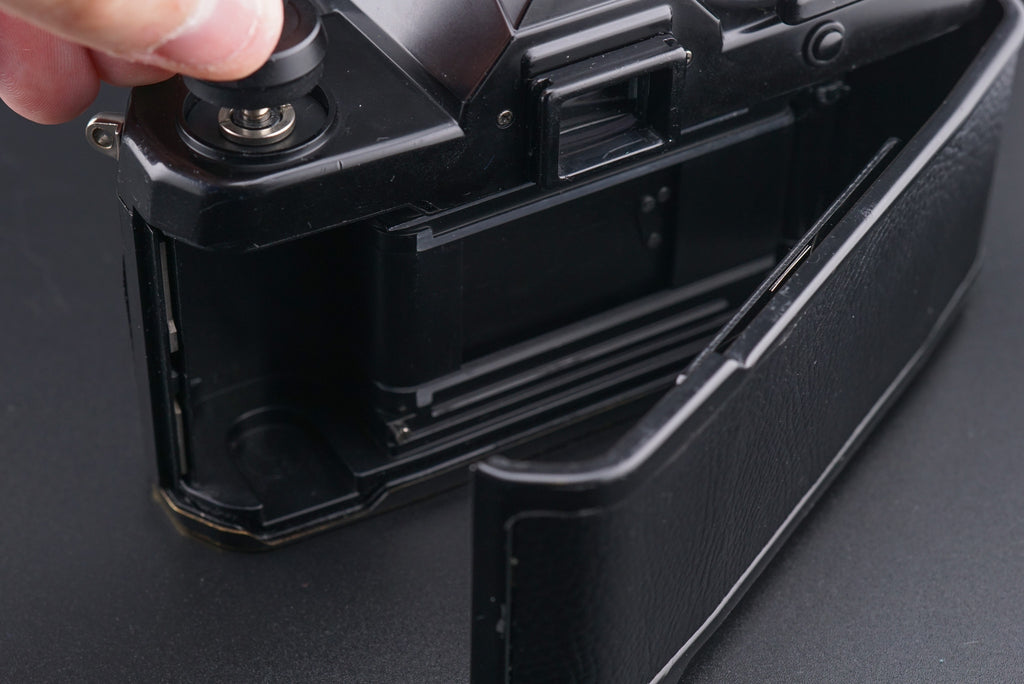 |
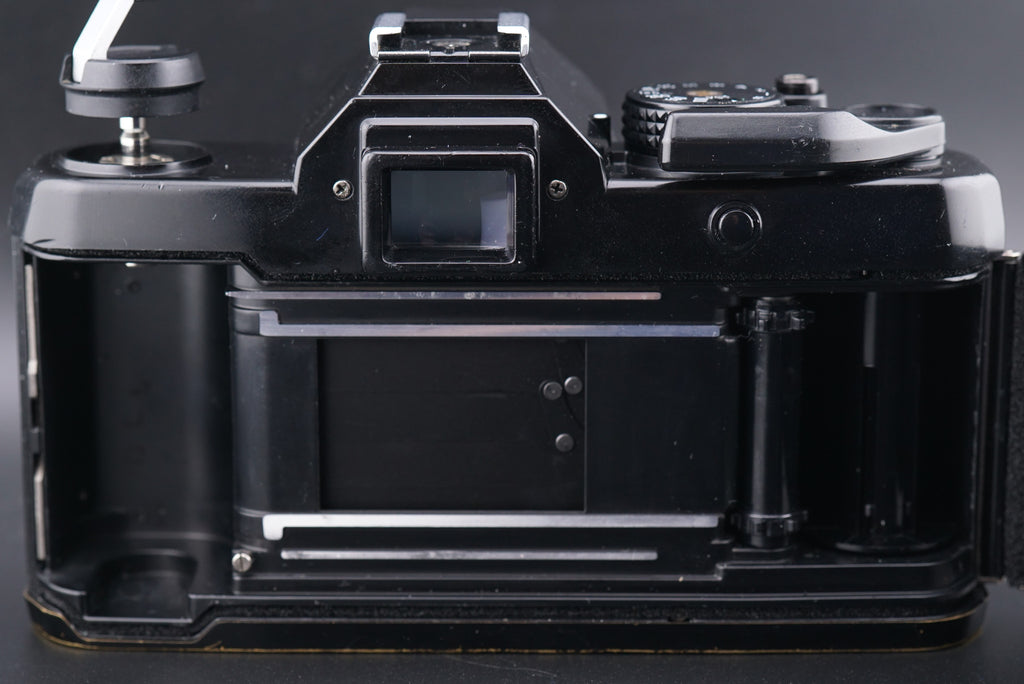
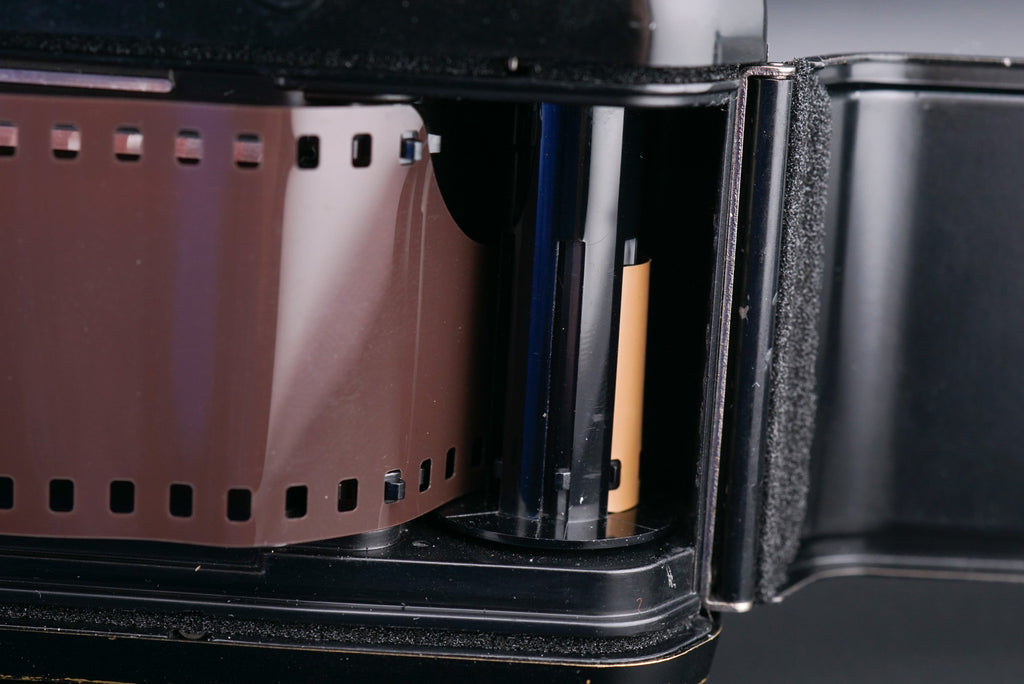
Regardless, now we can fully open the back and see the inside of the camera. From left to right we’ll see the the film compartment, shutter, advance spool, and take-up spool. All of these work in conjunction to get the film in the right position and then capture a photo on it. It’s pretty complicated, and these are just the parts that are visible!
 |
 |
Loading the camera, thankfully, is pretty simple. What you’ll want to do is take your roll of film and put it into the film compartment. You can then press the rewind knob back down, it has slots that fit into the film canister to hold it in place. Make sure you put the film canister in the same way I did in the photo below (with the canister’s “bottom” facing upwards). It won’t fit the other way, but don’t try to force it!
Next, you’ll want to pull the film leader (the thin section at the end of most rolls of film) across the shutter. Try not to touch the shutter, it’s quite sensitive. Pull the film until it reaches the spool all the way to the right.
Taking a look at this spool, you’ll see it has vertical slits that go around ⅔ of the way up the spool. At the button of these slits is a tooth. This is what grabs the film and pulls it. For a demonstration, you can wind your film advance lever and watch the spools move. One moves left, and one moves right. So the film is pulled between them!
 |
 |
 |
 |
Take the film leader and push it into one of the slits, making sure the holes on the film line up with the tooth on the indent. Once it feels secure, pull the advance lever. The film should be pulled tight against the inside of the camera. If the film comes disconnected from the spool, don’t worry! It can be tricky to line it up properly. Just try again until the film is pulled successfully. You’ll be able to see the lighter-colored side of the film wrapped around the spool if you’ve done everything right.
If this isn’t your first roll, you can close the film back here. But for a first-time user, I would recommend firing the shutter and winding the film one more time just to be 100% sure your film is attached properly. You’ll lose a shot or two from your roll, but that’s better than losing an entire day of memories because the camera wasn’t loaded properly, right?
Once you’re confident that your camera is loaded properly, close the film back. It should click back into place. Now we can pick the camera up and look at the top plate. Specifically, we want to look at the frame counter.
We need to advance the film and fire the shutter until the frame counter’s indicator lines up with the number 1. This will make sure our first actual shots don’t have light leaks from our loading procedure. After that, you’re ready to take photos!
How to Rewind & Unload Film
Basically, rewinding film is the same process but in reverse! Okay okay, there are a few extra steps.
You’ll know you’ve finished the roll because you won’t be able to advance the film anymore. It’ll feel quite tight and resistant. Don’t force the advance lever or you could rip the film!
Once the roll is done, you can rewind it. To do this, press the rewind button on the bottom of the camera. Then we can use the rewind knob to rewind the film. It makes it a lot easier if you flip out the rewind knob’s lever arm.
It may take a while to rewind the film, but eventually, you should hear a small click and notice that there’s much less resistance on the rewind knob. This means that the film has disconnected from the take-up spool! Just rewind a bit more and the film should go entirely back into the canister, just how a lab would want it. Once you feel confident the film is fully rewound, you can open the film back (just like before) and remove the canister!
With that, you’re totally ready to bring your film to a lab for processing! Congratulations, you’ve successfully loaded, shot, rewound, and unloaded a roll! But wait, we haven’t talked about the actual shooting part yet.. Okay, let’s get inside the viewfinder!
The Viewfinder
The camera’s viewfinder tells you what the photo will look like when you take the photo. Since the Yashica FX-3 has a light meter, it can also tell us whether or not our photo will be properly exposed. A lot of information is conveyed by the viewfinder so it’s important to understand what the camera is telling you. Let’s start with focusing.
Focusing Aid (Split Prism)
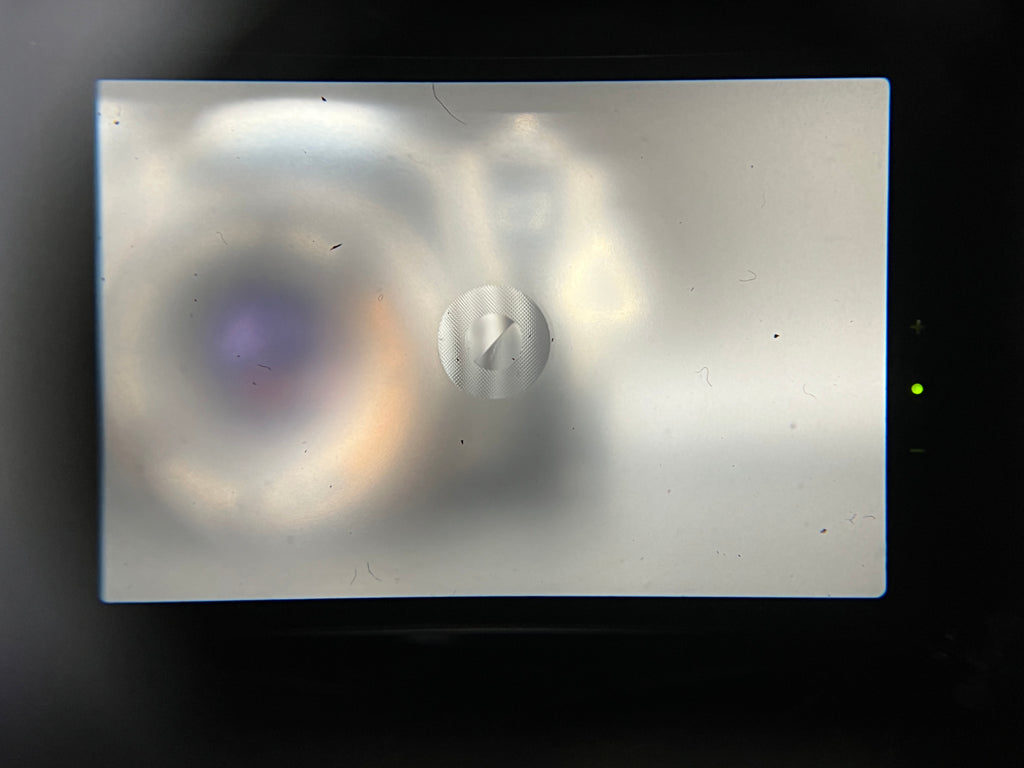
In the center of the viewfinder there should be a focusing aid of some kind. All Yashica FX-3s have a “split prism” surrounded by “microprisms”. All these prisms are meant to help you get your subject in focus so they’ll be sharp in the finished photos.
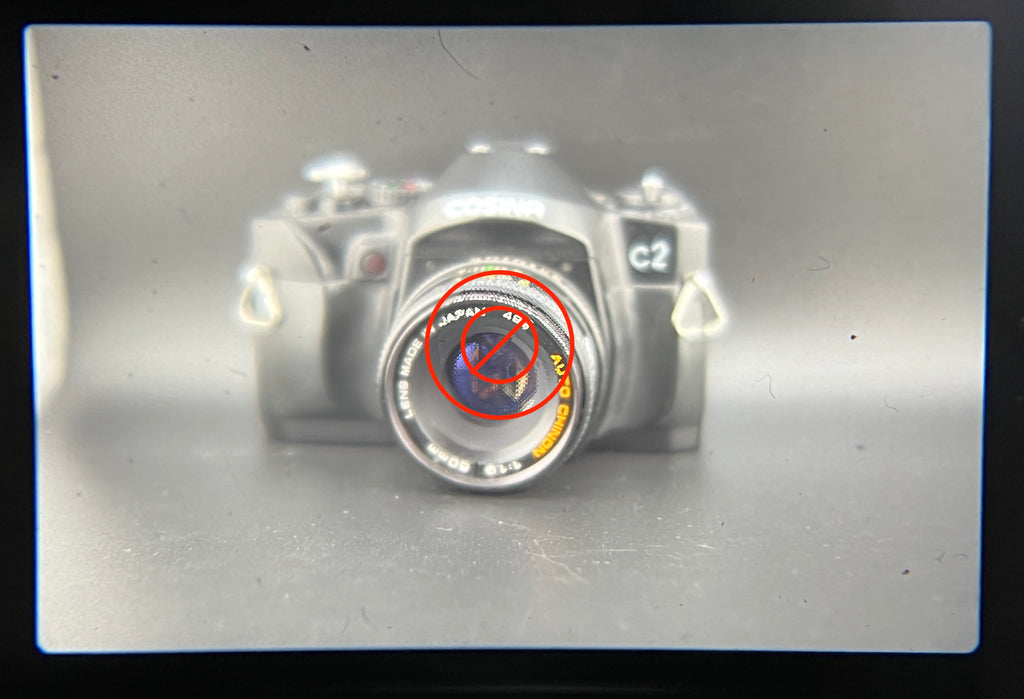
The split prism is the circle in the middle with a diagonal line through it. If you rotate the focus ring on the lens while looking through the viewfinder, you should see the top and bottom sections of this split prism move left and right. Your goal is to make the top and bottom line up! If you do that, whatever is in the center of the frame will be in focus.
Try focusing on something close to you and then pointing the camera at something far away. Even if the split prism is lined up correctly for the close object, it won’t be lined up for the far-off object. You’ll need to refocus on subjects at different distances.
Surrounding the split prism is a ring of what are called microprisms. These help with focusing just like the split prism, but in a different way. If you look at an out-of-focus object through the microprisms, you’ll notice a “texture” on the object. The more out of focus, the stronger this texture. To achieve proper focus with the microprisms, rotate the focus ring until the object appears normally.
By using these two focusing aids (and some practice) you should be able to quickly and easily focus on most things! Now that we’ve got the subject in focus, let’s make sure the photo will turn out properly by looking at the light meter.
The Light Meter
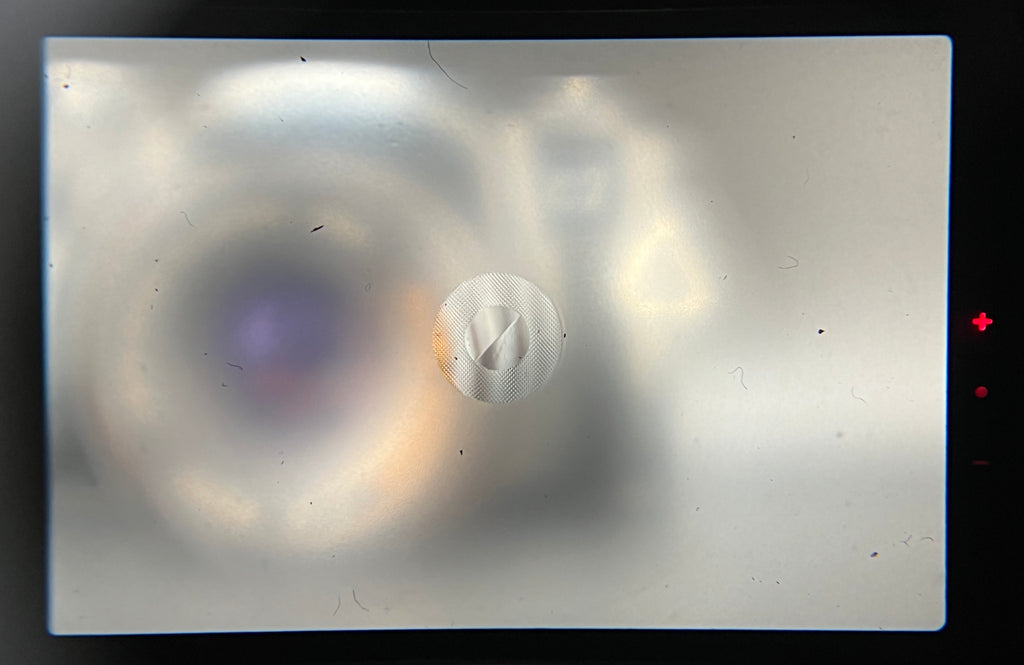
The light meter in the Yashica FX-3 is a set of three LEDs that communicate whether your photo will be over, under, or properly exposed based on your selected settings. There’s a red plus, a green circle, and a red minus.
 |
 |
The plus and minus mean over and underexposure, respectively. That means that we want a green circle for our photos to be properly exposed. You need to change the shutter speed or aperture until this green circle appears.
Unfortunately, the Yashica FX-3 does not have any way to tell you what settings you have picked inside the viewfinder. You’ll have to take your eye away from the viewfinder to see your settings. The Yashica FX-3 does not have automatic modes like other popular cameras like the Canon AE-1. You have to pick both shutter speed and aperture to get a good photo.
For a beginner, I’d recommend keeping the shutter speed at 125 or 250 and then adjusting the aperture until you get the green circle.
Common Issues & Conclusion
If a Yashica FX-3 hasn’t been used for decades, a number of issues can occur. There are a few things you should check if you find an FX-3 somewhere.
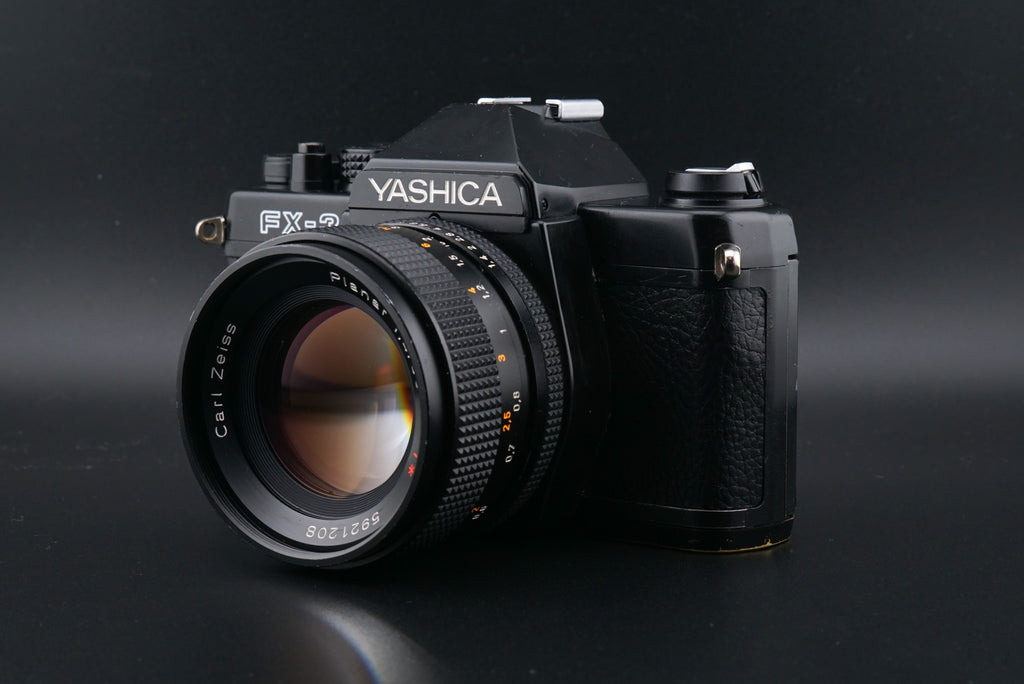
The most obvious thing will be the condition of the leather coverings. The original coverings for most Yashica and Contax cameras of this era has worn off by now. This material was flaky from the beginning and just didn’t hold up over decades. This can make the camera look and feel gross. Luckily, it’s not so hard to find replacement leatherette for the Yashica FX-3. Our example here has had the leathers replaced and it looks as good as new!
Another thing worth checking is the position of the mirror. We’ve noticed some issues with the Yashica FX-3’s mirror sliding down. This is due to poor quality glues used when the camera was built. If the viewfinder is dim or blurry with a lens on it, the mirror may not be in the right spot. Don’t use the camera if this is the case, as it can hit the back of the lens and scratch it up.
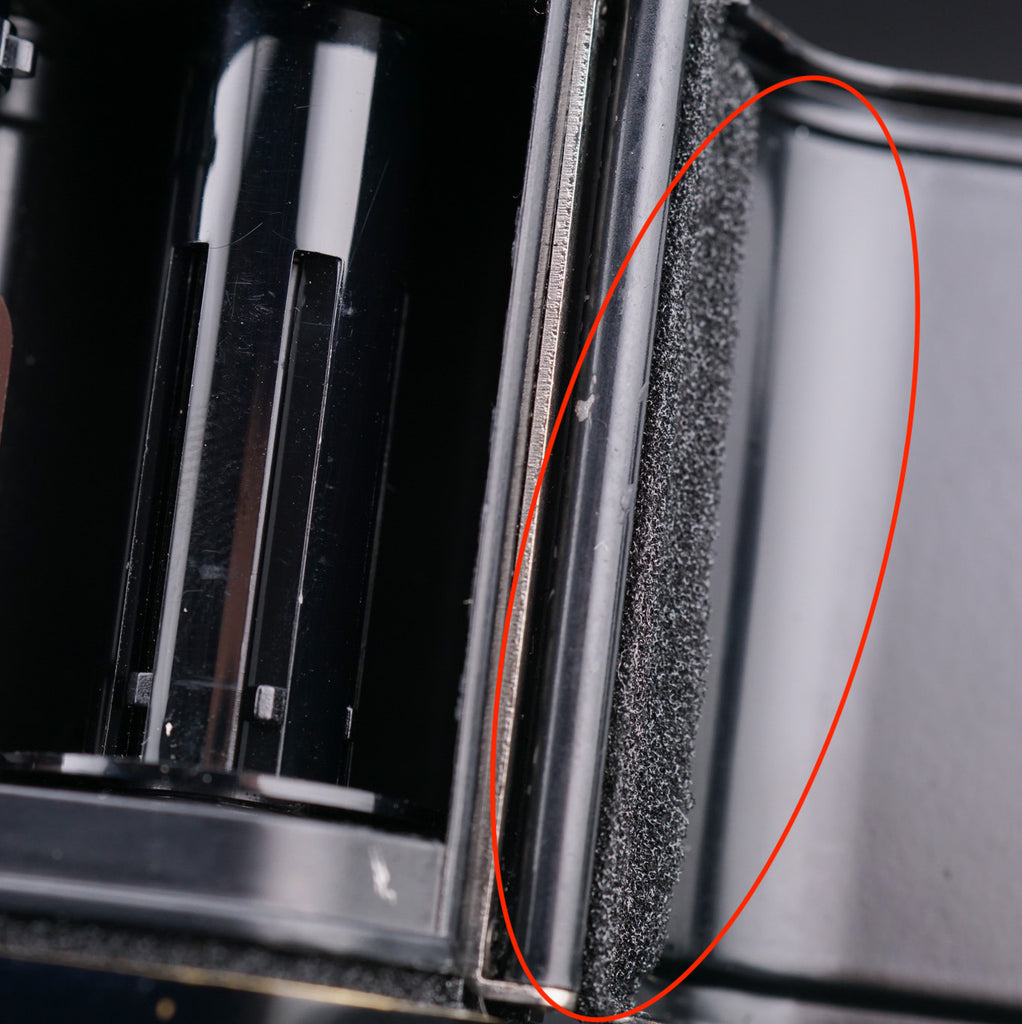
Another thing is to look at the light seals. These are the foam seals that exist around the edges of the film chamber inside the camera’s back. A used Yashica FX-3 will need new light seals. It’s not a hard repair to do this yourself, but you do need special foam and glue. We sell it on our site if you’re interested!
It’s also worth checking to see if the viewfinder LEDs are working properly. If they don’t turn on even with fresh batteries, that’s a sign that something’s wrong! Luckily, the Yashica FX-3 does not require batteries for most functions. If the light meter doesn’t work, you can always use the camera with an external light meter.
Speaking of the lens, it’s also important to check that. You can take the lens off the camera and shine your phone’s flashlight through it. This will illuminate any issues that may exist inside the lens. Some dust inside the lens isn’t an issue, but if you see something that looks foggy or something that looks like spiderwebs, that’s an issue. The spiderwebs are fungus, and this will grow over time and can possibly even spread to the camera itself. Not fun.
If you feel like you just want a camera that works, you can always check our website. We have trained mechanics who inspect and repair Yashica FX-3s. It costs a bit more, but it can save you money in the long run and give you a welcome peace of mind.
Otherwise, that’s been a (not-so) brief overview of the Yashica FX-3. Thanks for reading and I hope you learned something! If you have any questions at all about using your camera feel free to reach out to us on Instagram (@Kamerastorecom), via email (info@kameratori.fi), or via the chat function of our website. We’re always happy to help. (-:


